
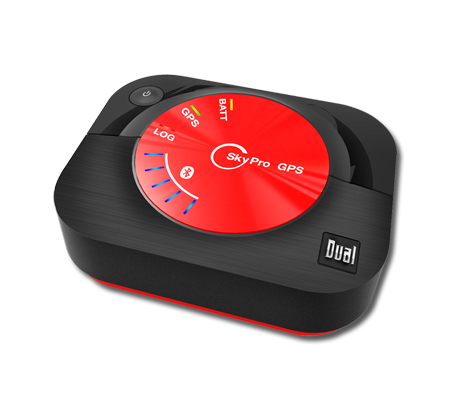
USING THE BUTTON
| POWER ON | -Hold button for two seconds and release. Illumination of either the blue or green LED indicate it is powered on. |
| START/STOP TRACKING | - Click the button twice (very quickly) to begin recording. A blinking amber LED indicates XGPS is recording data. Two quick clicks with also stop tracking. |
| TO POWER OFF | - hold the button for 4 seconds and release. |
UNDERSTANDING THE LED's
| BLINKING GREEN | - Attempting to acquire a GPS position fix. |
| SOLID GREEN | - GPS position fix aqcuired. |
| BLINKING BLUE | - No Bluetooth connection to iPhone or iPad. |
| SOLID BLUE | - Bluetooth is actively connected to iPhone or iPad. |
| BLINKING AMBER | - Actively recording data. |
| SOLID AMBER | - DO NOT USE THIS MODE, triple click to stop and restart with a double click. |
TIPS
XGPS IS NOT WATERPROOF!! A few drops won't hurt, but do not power-wash or allow sustained exposure to water.
Charge your XGPS regularly. Make sure it is powered off when connecting it to the charger for long periods of time. This will extend your battery life.
3
Mount Your XGPS
The XGPS can be mounted on the helmet or front fender. Use the velcro mounting strips included in your kit.
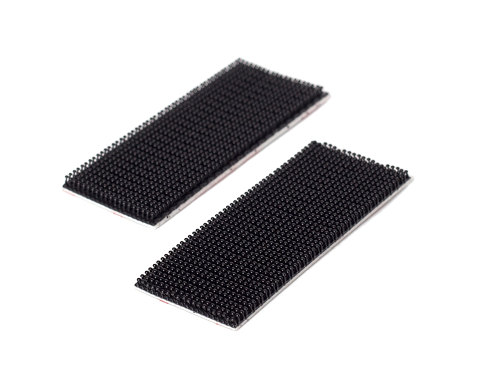
HOW TO MOUNT YOUR XGPS
- Identify a location on your helmet or fender to apply your mounting strip. For other applicaitons, including fourwheel, superbike, or kart contact us for ideal mounting locations.
- Wipe the area with contact cleaner or alcohol to remove any residue and insure good adhesion.
- Remove backing and place on helmet or fender. Allow 15 min for adhesive to bond well.
- Line up your XGPS and lightly press it onto the mounting strip to mesh velcro.
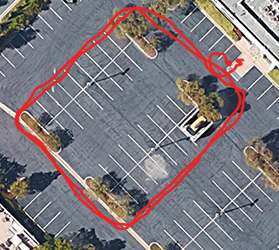
PHOTOS & VIDEOS
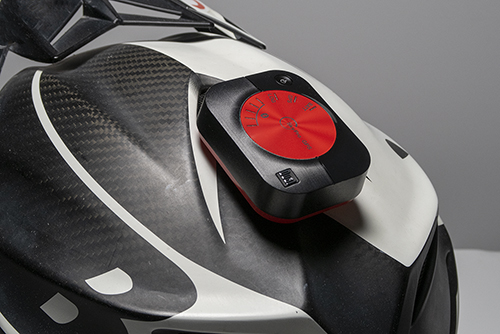
XGPS helmet mount example
4
Your First Session
Pair your XGPS and log your first session of data in the LITPro App.
SETUP YOUR XGPS
- Turn on XGPS with a two second button hold.
- On your iOS device go to settings > Bluetooth (turn on Bluetooth if it is off).
- After a few seconds, your XGPS will be listed under “My Devices” as XGPS160-xxxxxx.
- Tap XGPS160-xxxxxx to connect it.
- After approximately 10 seconds, the XGPS160-xxxxxx will change from “Not Connected” to “Connected”.
- The blue LED on XGPS will blink rapidly and then stay illuminated, indicating a successful Bluetooth connection.
- Download the LITPro App from the iTunes App Store and log in to your account (or create a new one if you have not already).
- Link the XGPS to your LITPro account by pressing “Add Session” then “Pair a New LITPro”. Give your XGPS a nickname
TIP Give your XGPS a short, but useful nickname. Our suggestion is your last name followed by a race number.
RECORD YOUR SESSION
- XGPS should have a clear view of the sky in all directions.
- When you are ready to begin your session, double-click the button to start recording data. The LOG LED will blink orange. IMPORTANT: A triple-click will initiate the continuous logging mode, indicated by a solid orange LED. If this happens, triple click to stop recording and start again using just two clicks.
- When you complete your session on the track, double-click the button to stop recording data. The LOG LED will no longer be illuminated orange.
- Repeat steps 1 to 4 for all additional sessions. A four second hold of the button will power the XGPS off when your track day is finished.
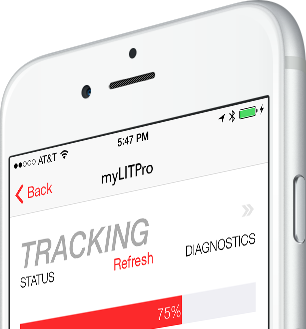
SYNC YOUR SESSION
- Press the “Sync Now” button to connect to your XGPS and on the next page press “Sync Data” to begin transferring data. IMPORTANT TIP: While transferring data, make sure your iOS device stays in Bluetooth range (30 ft or less) of your XGPS and has a solid Internet connection.
- LITPro will automatically select a valid track configuration for you to use if one already exists. You also have the option to create a new one if necessary.
- Tap “Apply Tracks”.
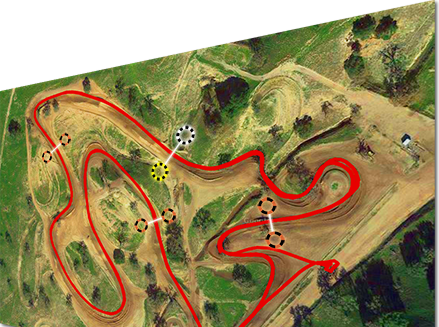
PHOTOS & VIDEOS
Example 2-lap walking pattern
How to pair an XGPS
How to sync your XGPS
5
Track Configs
LITPro automatically selects a valid track config if one already exists. If you have to create a new config, this is the process.
TRACK CONFIG FUNDAMENTALS
- Starting lines, finish lines and segment gates must intersect all route lines to be valid.
- For lap-based circuit tracks (i.e. most MX tracks), starting lines and finish lines should be the same. Place your starting line first, then use the "copy" button to create your finish line.
- Creating 3 to 4 segments is ideal. Too many is typically more confusing than it is helpful.
- Create track configs others will find intuitive to use and name them appropriately. TIP:Try to use the current existing track config if possible. Laps can only be compared across sessions that use the same config.
ASSIGNING OR CREATING A TRACK CONFIG
- Launch the LITPro app, tap on the "Add Sessions" button in the upper-right, then tap on the "Past Syncs" button and finally tap on a recent sync that says "Needs Track Configuration". Or if you have just finished a sync you will have automatically advanced to the next step.
- The LITPro TrackIQ technology will automatically select a track config for you if one already exists. If you see a green checkmark next to the sessions detected in the sync you completed then you can finish by tapping "Apply Tracks" in the lower-right. Once you've done this, you can return to the analytics section of the LITPro app to review the details of your session(s).
- If no suitable track configs exist, then click on the "Create New Track" option. The app will guide you through the process.
TROUBLESHOOTING
- My sync is finished, but the session doesn't show up in the LITPro app.
- The most common cause of this problem is your start and finish lines don't intersect any of your lap route lines. See instructions above for creating start and finish lines to correct your track config, and re-process your session.
- I don't see a Lap99 for my session.
- The most common cause of this problem is your session does not include any segments, or your segments were not created in the order a rider would cross them. Without segments, it is impossible for our system to generate Lap99.
- I've created segments, but still can't see a Lap99, and comparison laps don't work.
- It is likely that you have a stray segment somewhere that doesn't intersect any lap lines. To correct this problem, while in the track config tool, swipe left on the segment name in the list of segments off to the left and it will reveal the "delete" button.
- One or more of my laps is twice as long or more than the others.
- This is what happens when your start/finish lines don't intersect all of your lap routes. It is likely that you need to create a wider starting/finish line gate.
- I rode two tracks in a single session, but the app will only let me choose one track configuration.
- If you contact us we can manually split that session in to two sessions, but this takes a bit of work and can't be automated yet... What we recommend is that you turn off tracking for at least 30 seconds before getting on a different track. This will cause those two tracks to be logged as a separate riding session.
PHOTOS & VIDEOS
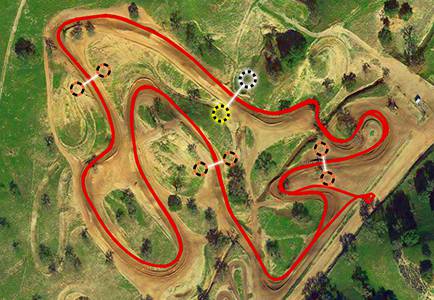
Track Config Example
How to create a new Track Config
How to choose a different Track Config