1
Download the LITPro App
LITPro has a dedicated app for MX and for ROAD. Use the app that best suits your needs (i.e. if technique in the air is important, use the MX app).


2
Operating LITPro, Basics
Learn the basics to operating your LITPro including button functions, LED meanings and more.
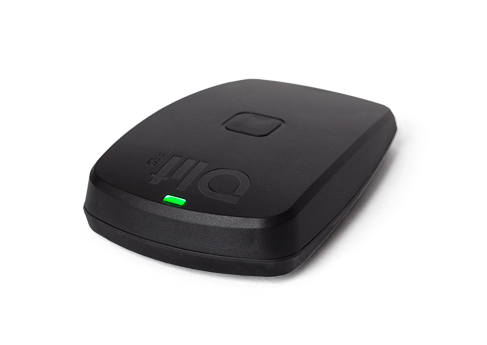

BUTTON FUNCTIONS
| TO POWER ON | - one short press. A solid blue or green LED color means LITPro is powered on. |
| START/STOP TRACKING | - once powered on, press the button one time to begin recording. A blinking green or red LED means LITPro is recording. |
| TO POWER OFF | - hold the button for 4 seconds and release. |
LED OPERATING SIGNALS
| SOLID BLUE | - powered on but no GPS position fix available yet. |
| SOLID GREEN | - powered on and a good GPS position fix has been acquired. |
| BLINKING RED | - recording data, but no GPS fix yet, this usually corrects itself within a few seconds when you have a good view of the sky. |
| BLINKING GREEN | - recording riding data and everything is good. |
| BLINKING WHITE | - charging (three quick flashes means battery is critically low). |
| SOLID AMBER | - Bluetooth syncing with iPhone. |
VIDEOS
Typical operating example
Charge your LITPro regularly, and make sure it is powered off when left on the charger for long periods of time. This will extend your battery life. (10 hour typical operating time on a full charge).
LITPro is not waterproof!! Your LITPro can take a little sprinkle, but don't power-spray or immerse in water.
3
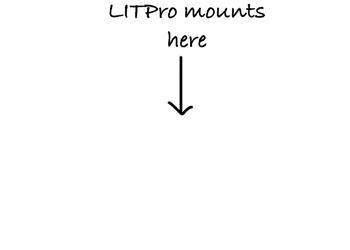
Mount LITPro
LITPro is mounted on your helmet using the 3M mounting strips provided in the packaging you received.
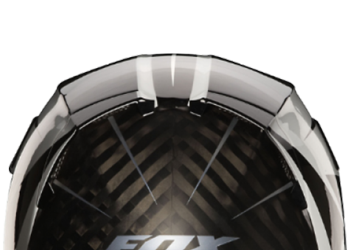
HOW TO MOUNT LITPro
- Identify where on your helmet to apply the 3M mounting strip. Pick a spot where GPS receiver will get the most consistently unobstructed 360° view of the sky while riding. For road, kart or superbike please ask us for ideal mounting locations.
- Clean the area of the helmet where the 3M mounting strip will go.
- Remove the 3M mounting strip adhesive backing and place on helmet.
- Press your LITPro on to the mounting strip and visually inspect that it is properly aligned and fully meshed.
PHOTOS & VIDEOS
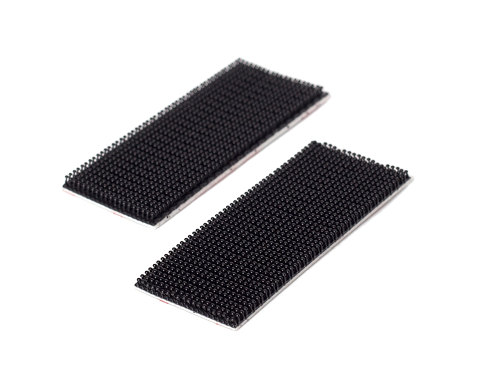
3M Mounting Strips (included)
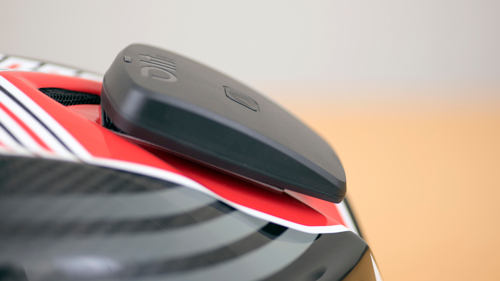
LITPro helmet mount example
Mounting LITPro Video
Mount with care!! When mounting LITPro on the helmet or vehicle, don't use excessive force as it can cause strain on the internal electronics.
Regularly check for debris or wear on the 3M velcro strips. Replace if you see any visible sign of wear or debris. You can order additional mounting strips here.
4
Your First Session
Pair your LITPro, set up a heart rate monitor (optional), and log your first session with the LITPro MX or ROAD App.
PAIR LITPro TO YOUR ACCOUNT
- Turn on LITPro by giving the button one short press.
- Launch the LITPro MX or ROAD app (make sure you have bluetooth enabled), click the "Add Session" button in the upper-right and click the (plus sign) button next to "My LITPro(s)".
- Here it shows a list of nearby LITPros. Click on your unclaimed LITPro and claim it by giving it a nickname.
Tip... If you don't see any devices here, make sure LITPro is turned on, and that your phone has bluetooth enabled. If you still don't see it, try restarting your app, or possibly turning off bluetooth and turning it back on from your phone's settings manager.
Extra... Give LITPro a short, but useful nickname. Possibly something like your last name followed by your race number i.e. ZINN99.
CONNECT A HEART RATE MONITOR (OPTIONAL)
Show me instructions for connecting a heart rate strap...- Launch the LITPro MX or ROAD app, and make sure LITPro is powered on and nearby.
- You will also need a heart rate monitor that uses Bluetooth connectivity. The Polar H7 or Polar H10 are good choices.
Note... In these next steps you will favorite your LITPro to a heart rate strap. This will be a one-time setup. Once these are paired they will be linked together whenever both are turned on and in proximity of each other. So just put on your HRM strap, get on your bike, turn on LITPro tracking, and go... - From the "Add Sessions" of the app, tap on your LITPro device.
- Tap on the (plus sign) icon where it says "Add a heart rate strap".
- Follow the instructions provided by the manufacturer of your heart rate strap to turn it on (usually just wet it and put it around your chest on your bare skin).
- Look at the bottom left corner of your app screen for a button that says "Discover HRM(s)". Tap that, within a few seconds you should see the result of the discover process. If no HRM is found, repeat the previous step and this one. Common problems are that the HRM is getting discovered first by another app or watch or device that is running that would prevent LITPro from finding it. Or that you haven't applied enough "wetness" to get your HRM to wake up and begin advertising its existence.
- Once you see a discoverable HRM strap, tap on it to get it "favorited".
- While the app is running and connected to LITPro, and your LITPro is connected to your heart rate strap, you should see the (heart shaped) icon turn red indicating this is so. From here on out LITPro will aggressively search for this "favorited" HRM and any time it is on and in range a connection will be made.
TRACK SOME DATA
- Make sure you are outdoors in an area with a good view of the sky, and that you have LITPro on with a solid GPS fix (as indicated by a solid green LED).
Caution... While it would be great to have your first experience be on your bike at your favorite MX track, this isn't necessary or even very convenient for this learning exercise. So keep in mind that taking a walk around your neighborhood will not result in the user experience we have spent years designing for you. LITPro works best mounted on a helmet, and because of the way our algorithms are designed it also works best when you are moving at typical MX speeds. A slow walk holding LITPro in your hand will produce some wiggles in the data, so be warned... - Plan your route. Ideally here you mount LITPro to your helmet, turn on tracking, and lay down a few laps... But fine also if you just take a quick walk out in an open area nearby.
Important... If going for a walk, create a short and simple track-like pattern, i.e. a 100ft radius circle is fine. Repeat this same pattern at least 2 or 3 times. If on your bike, take at least 2 or 3 laps on the track. Something short and simple, but repeatable will do. This pattern will be helpful in the next steps when we create our first track configuration. - Now that you have your route planned, turn on tracking by doing one short press of the button on the LITPro unit (your LITPro unit should start blinking green), and begin your walk/ride along your planned route doing 2 or three complete laps.
- Turn off tracking by doing one short press of the button on the LITPro unit (your LITPro unit should go back to a solid green LED signal).
- Return to an area with a good connection to the Internet.
SYNC YOUR LITPro
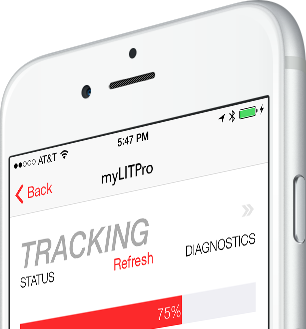
- Launch the LITPro MX or ROAD app and tap the "Add Session" button in the upper-right and connect to your LITPro by tapping the "Sync Now" button.
- Follow the on-screen steps from here to begin the sync process. Depending on how much data you have tracked this process may take some time (typically about 30% of the length of your session). An Internet connection via Wifi or cellular is required for this step to complete properly.
Tip... If during this step your Internet connection flakes out, or you get distracted and move out of range of LITPro, there are several recovery mechanisms in place that will help the system resume where it left off. Just get back in Bluetooth range, follow the steps above to re-connect to your LITPro, and the system will automatically prompt you with steps to initiate the sync recovery. - Once sync is complete the app will auto-advance to the next step, which is where you will need to either create a new track configuration, or apply an existing one.
PHOTOS & VIDEOS
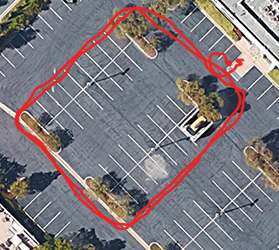
Example 2-lap walking pattern
How to pair a LITPro
How to pair heart rate
How to sync your LITPro
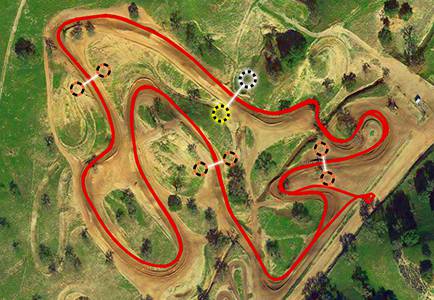
5
Track Configs
Finish processing your sync'ed session by assigning or creating a new track config. A smart track config is key to finding ways to improve your lap time.
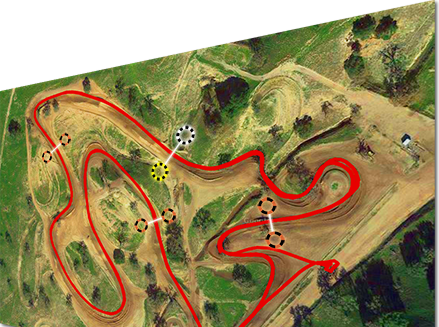
TRACK CONFIG FUNDAMENTALS
- Starting lines, finish lines and segment gates must intersect all lap lines to be effective.
- For lap-based tracks (i.e. most MX tracks), starting lines and finish lines should be the same. Create your starting line first, then use the "copy" button to create your finish line.
- Segment gates must be created in the order as they would appear for a rider on the track.
- Lap99, Lap Comparison, and other algorithms are all dependent on lap segments to be defined.
- Creating 2 to 5 segments is ideal. Too many is more confusing than it is helpful.
- Try to create track configs that others will find intuitive to use as well (name them appropriately).
- Try to use existing track configs where appropriate. This will help with future development we've got in the works... hint leaderboards... it also makes it more fun to ride with friends.
ASSIGNING OR CREATING A TRACK CONFIG
- Launch the LITPro app, tap on the "Add Sessions" button in the upper-right, then tap on the "Past Syncs" button and finally tap on a recent sync that says "Needs Track Configuration". Or if you have just finished a sync you will have automatically advanced to the next step.
- The LITPro TrackIQ technology will automatically have a track selected for you if one exists already that is a good match for the riding you did. If you see a green checkmark next to the sessions detected in the sync you completed then you can finish by tapping "Apply Tracks" button at the lower-right. Once you've done this, you can return to the analytics section of the LITPro app to review the details of your session(s).
- If no suitable track configs exist, then click on the "Create New Track" option.
- Creating a track is quite easy once you've got it down... From here the app will guide you through the process of creating starting lines, finish lines and segment gates.
TROUBLESHOOTING
- My sync is finished, but the session doesn't show up in the LITPro MX app.
- The most common cause of this problem is your start and finish lines don't intersect any of your lap lines. See instructions above for creating start and finish lines to correct your track config, and re-process your session.
- I don't see a Lap99 for my session.
- The most common cause of this problem is your session does not include any segments, or your segments were not created in the order a rider would cross them. Without segments, it is impossible for our system to generate Lap99.
- I've created segments, but still can't see a Lap99, and comparison laps don't work.
- It is likely that you have a stray segment somewhere that doesn't intersect any lap lines. To correct this problem, while in the track config tool, swipe left on the segment name in the list of segments off to the left and it will reveal the "delete" button.
- One or more of my laps is twice as long or more than the others.
- This is what happens when your start/finish lines don't intersect all of your lap routes. It is likely that you need to create a wider starting/finish line gate.
- I rode two tracks in a single session, but the app will only let me choose one track configuration.
- If you contact us we can manually split that session in to two sessions, but this takes a bit of work and can't be automated yet... What we recommend is that you turn off tracking for at least 30 seconds before getting on a different track. This will cause those two tracks to be logged as a separate riding session.
PHOTOS & VIDEOS
Track Config Example
How to create a new Track Config
How to choose a different Track Config